Published September 21, 2022 12:14 PM PST
Updated March 1, 2025 12:02 PM PST
Why is My Startup Disk Full on My Mac and How Can I Fix It?
Why “Startup Disk Full” Alerts with These Easy Mac Storage Tips
There’s nothing more satisfying than getting engulfed in a project on your mac. Unlimited access to software can be captivating. It allows you to express your vision in whatever specific style you desire. I’m sure you can agree it’s the worst when a message suddenly pops up. It reads, “Your startup disk is almost full.” This prevents you from carrying on with what you were doing.
Once you click through to view your storage, you may see that it is completely full. The majority of the storage is taken up by items in the “other” column. Where are these “other” items that are taking up so much storage?
Now, if you’re like me, you may hold onto a lot of videos for editing or memory’s sake. These videos also take up a good percentage in the “Movie” column of your storage.
It’s time to do some deleting so you can get the most out of your Mac again.
How to Fix Your Mac’s Full Startup Disk Without Paying for Software
I spent countless hours searching the web for a solution to this problem. Unfortunately, I only found sponsored stuff that required downloads and purchases. These solutions offered something that can be done manually with some time and patience.
I’ll tell you exactly how to prevent this disruption from ever happening again for free. No downloads or purchases are required.
How to Organize Your Files and Free Up Space on Your Startup Disk
Step 1: Arrange “All My Files” by Size – Delete Nonessential Items
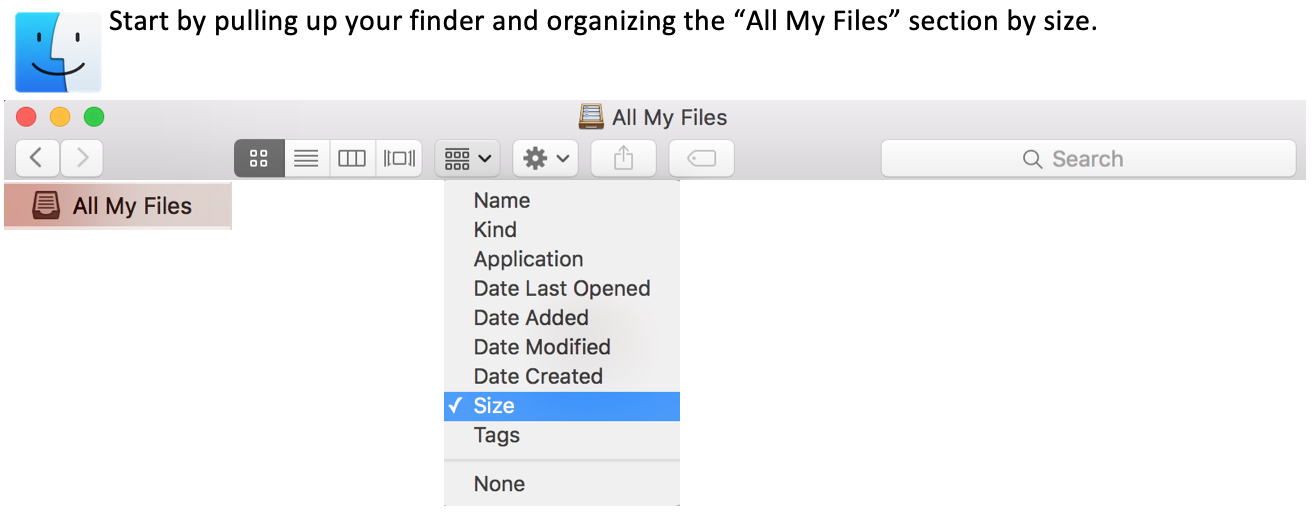
Every item in your finder will be organized starting from items that take up the most storage and going down to items that take less storage.

Start from the top and decide which photos, documents, audio, and video files you no longer need and trash them. Do this until you feel you only have items that are important and necessary in your finder.
Go to your trash bin. Drag to select every item. Press “Delete Immediately” so that they are no longer using any room on your startup disk.
Struggling to let go of some items? Consider using an external source of storage such as a hard drive. You could also use Apple iCloud, but this option costs money each month. The ultimate goal is to clear storage on your Mac for free. You may have to come up with your own process of releasing certain memories from your Mac.
How to Find and Delete the “Other” Files Taking Up Space on Your Mac
Step 2: Locate and Delete “Other” Files
The next step is to have the finder open and simultaneously press this combination of keys.
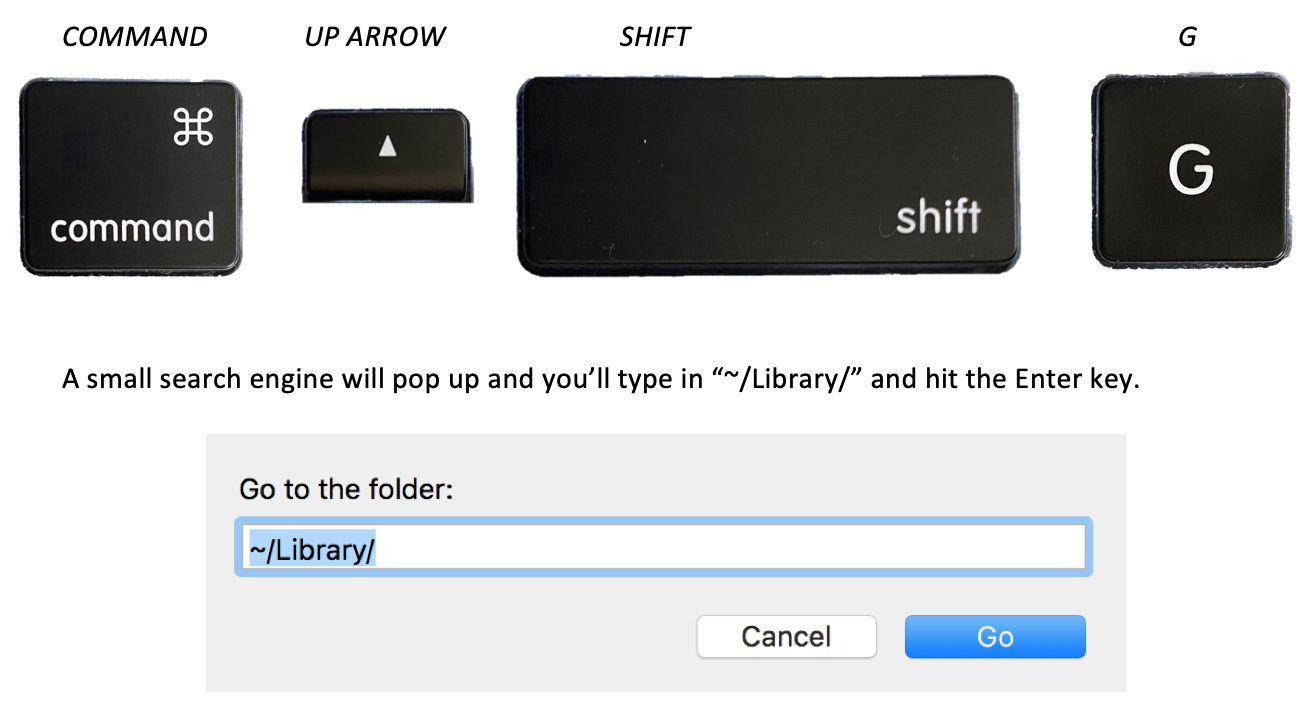
A small search engine will pop up and you’ll type in “~/Library/” and hit the Enter key.
Once the results come up, click the columns icon. This action will show all the items in a way that’s easier to navigate.›

It’ll look a little something like this.
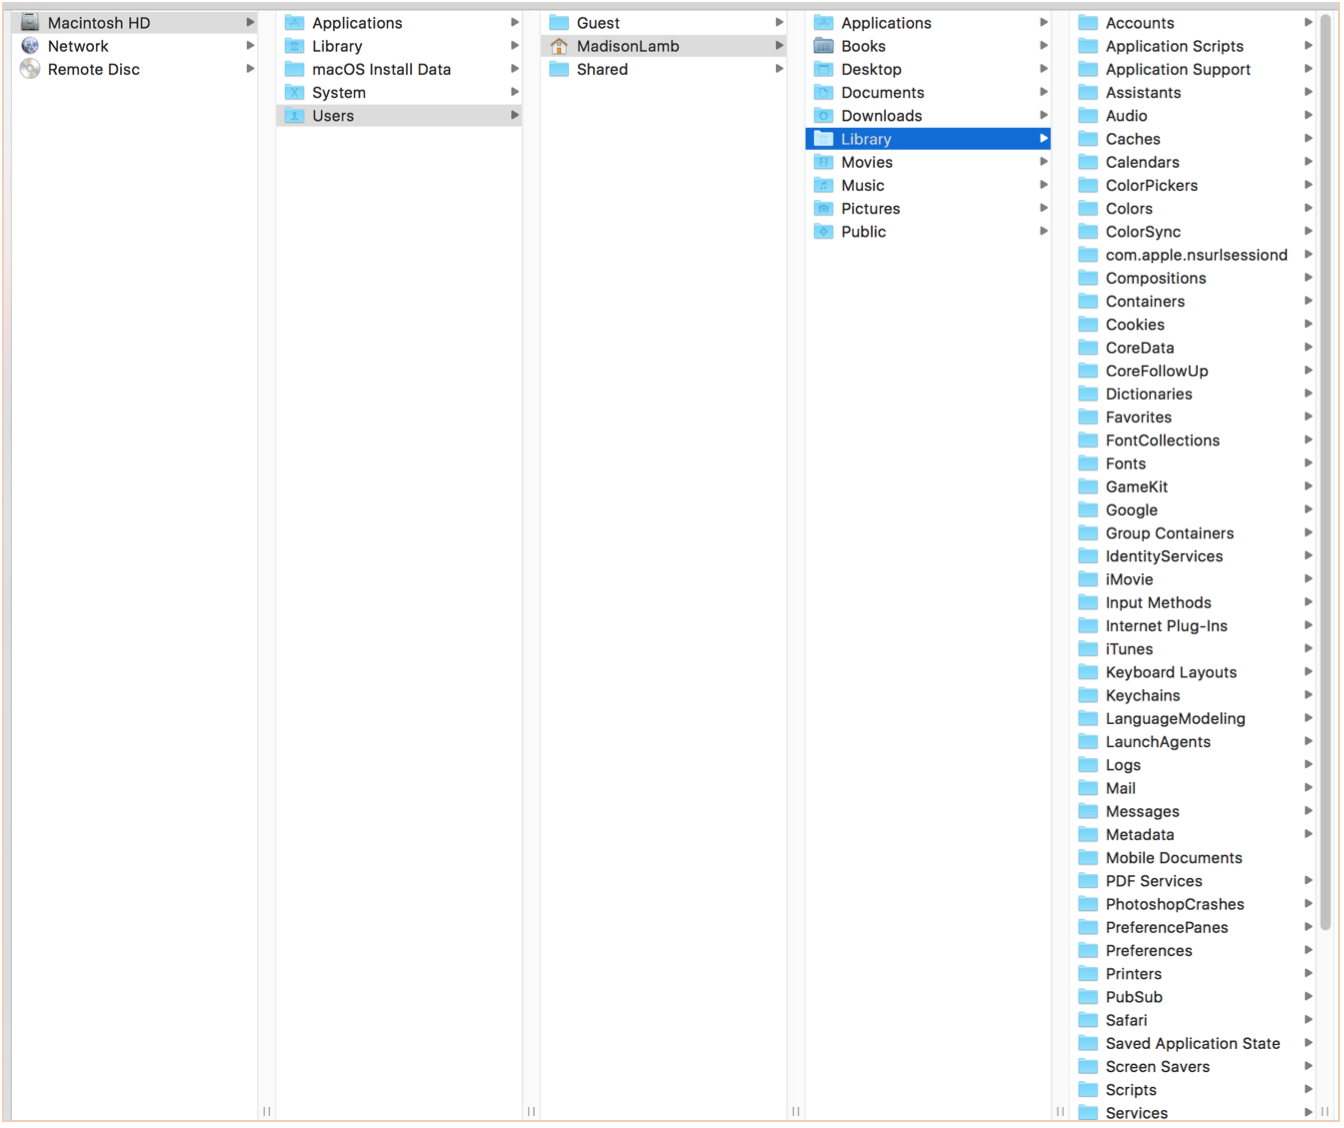
Now we’ve located all the files that aren’t accessed frequently. These are those files that take up a lot of the space in the “Other” category.
Almost every folder in the “Library” section highlighted below will reveal random items. You’ve never seen these items. You do not need to keep a majority of them but be careful not to delete anything too important.
As you click through the different sections such as “Accounts; Caches; Containers; etc.” you’ll find these unnecessary files take up various sizes. Move them to the trash, but not before some careful deliberation.
This part is where it can become overwhelming and confusing if you’re not timely and careful. This step is vital. If you delete something important to your Mac’s overall function, you could create more problems.
What to Avoid When Deleting Files from Your Mac
Disclaimer: I stumbled upon these files almost by mistake. I managed to save my mac startup disk. I am not a professional, so these are simply my tips and tricks for you.
I stuck mostly with items that end with “pdf. – Doc. – png.” (photos, documents, backup files that aren’t used).
Be sure to avoid any items that seem unfamiliar or have names/ markings which indicate importance.
A good sign you’re deleting something that you shouldn’t be is you’ll be asked to give your login password to fully remove the item from your mac. If this happens – do not delete it.
Just like in the last step go to the trash bin, drag to select all items, and press “Delete immediately” to ensure they’re no longer taking up any storage on your startup disk.
How to Clear Final Cut Pro Backups to Free Up Space on Your Mac
Step 3: (Optional) Delete Final Cut Pro Backups
This step is optional because if you do not have or use Final Cut Pro on your Mac then you don’t have to do what comes next. If you have this editing software, please continue reading. This was the most important step and it cleared a significant amount of storage from my startup disk.
You’ll need the finder results from the previous step open. Please refer back for instructions. Continue once you’ve pulled up the same window.
Click “Movies” instead of “Library” this time to reveal the back-ups for the video editing software on your computer.
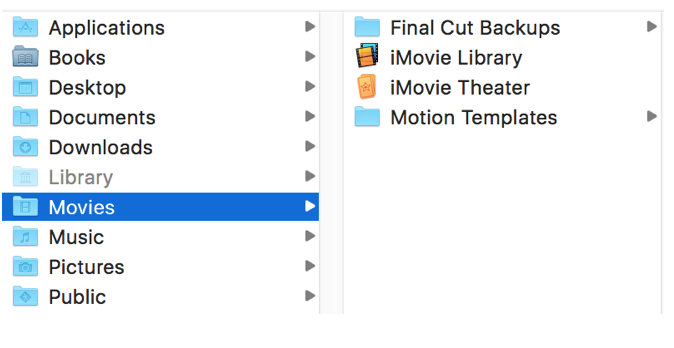
Click “Final Cut Backups” to show everything your mac is currently storing based off of all the projects you’ve ever edited in the software. If you’ve never done this before then you may have back up content from videos you edited when you first got FCP.

Disclaimer: I consistently delete my backups as shown in the picture above. It’s simply an example illustrating where to find your FCP backups. Don’t expect yours to look identical to mine.
If you see a video you’re currently working on then do NOT delete anything because you’ll lose all your progress. ONLY delete video back-ups that are finished, exported, and need no further editing.
Lastly, as in previous steps, we can’t forget to visit our trash bin, drag to select everything we’ve deleted, and press “Delete Immediately”.
How to Check Your Mac’s Storage After Deleting Files
Step 4: Check Your Storage After Deleting Files
Now the moment we’ve all been waiting for! Check your storage. Good as new! Now, only essential items are taking up your startup disk space and you can breathe easily because as long as you remember to do all these steps as needed you’ll never be interrupted by your lack of storage again.
How to Prevent Your Mac’s Startup Disk from Getting Full Again
Step 5: Prepare to Repeat Process Regularly
Recognize that the reason you got yourself in predicament is that you didn’t delete all the backup files your macs accumulated over time. No big deal, I had no idea it even needed to be done when I first got my mac.
If you don’t regularly repeat this process your startup disk will eventually fill back up and send you that awful warning. You can plan on doing it every few months or just find what works for you depending on how much and how often you use your mac and the software on it.
I hope this helped you get the most out of your mac again I know I was super stoked after I figure it out. Best of luck in your future creations!
CREATE. OPTIMIZE. INNOVATE.
High-Resolution Writing, LLC.

Subscribe to stay informed!


Discover more from High-Resolution Writing, LLC.
Subscribe to get the latest posts sent to your email.
